
How Often to Water New Sod
March 11, 2024
Artificial Turf Front Yard Ideas
March 27, 2024How to Lay Artificial Turf Grass
Transforming your lawn into a lush, green landscape year-round has never been easier with artificial turf grass. Artificial turf is easy to take care of, doesn’t need watering, and stays green all the time, no matter the weather, unlike real grass. This step-by-step guide of how to lay artificial turf grass will walk you through the process of laying artificial turf in your outdoor space, ensuring durability and a pleasing aesthetic appearance.
How to Lay Artificial Turf Grass: Planning and Preparation
Assessing Your Space
Understanding the Area Dimensions
The first thing you need to do when planning to install artificial turf is to carefully measure the area where you want to put the turf. Measure the length and width of the area to determine the square footage, which will help in ordering the correct amount of turf. It’s also vital to consider the shape of the area; irregular shapes may require additional planning for cutting and fitting the turf.
Choosing the Right Type of Artificial Turf for Your Needs
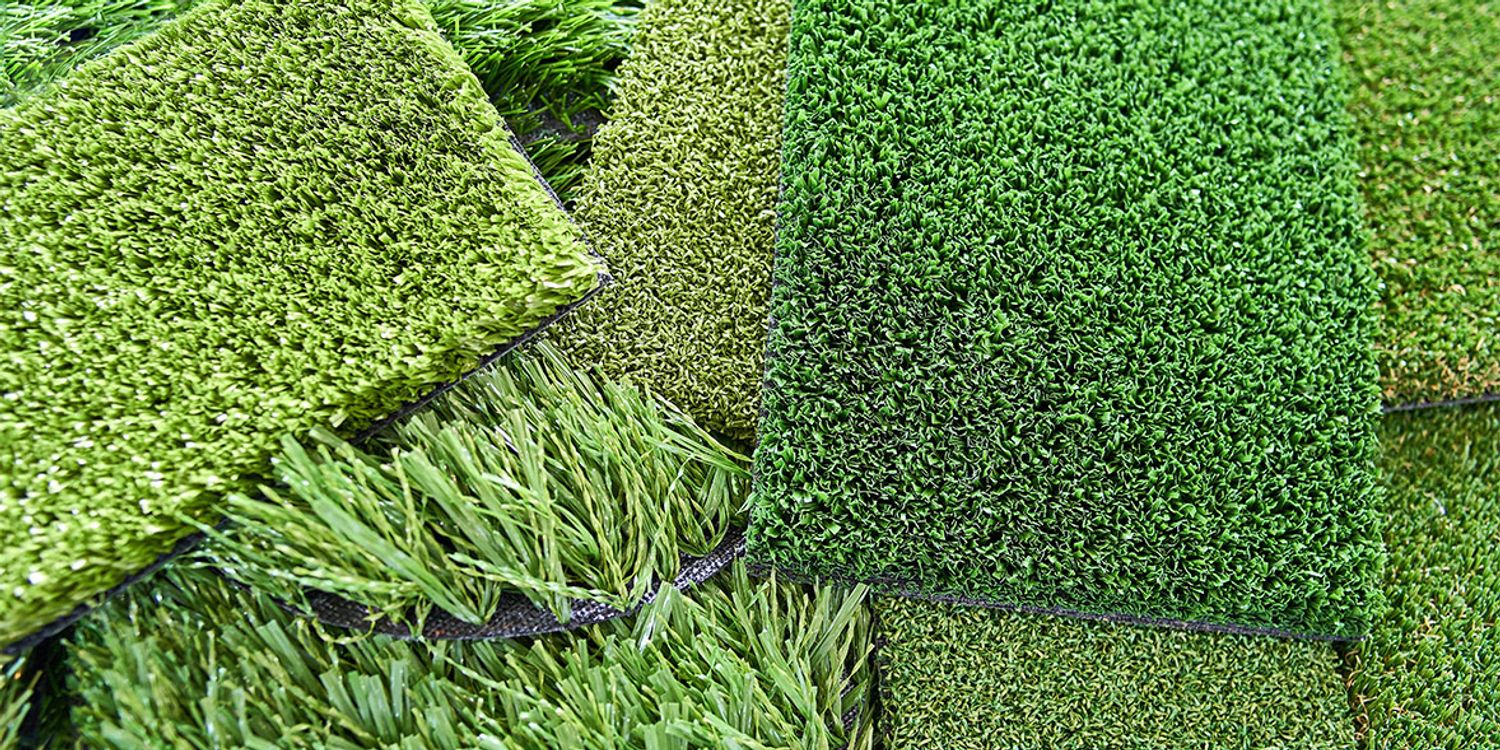
There are many kinds of artificial turf, each made for different uses and personal tastes. Consider factors such as the pile height (the length of the turf fibers), density, and color. For areas where a lot of people walk or play, choosing artificial grass that is shorter and thicker can last longer. Meanwhile, a longer pile height might be preferred for a more natural, soft appearance. Assess your primary needs—whether for landscaping, pets, sports, or play areas—to select a turf that best fits your intended use.
Tools and Materials Needed
Listing Essential Tools and Materials
Proper installation of artificial turf requires specific tools and materials. Here’s a list of essentials:
- Measuring tape for area dimensions
- Utility knife for cutting the turf
- A special cloth that stops weeds from growing through your artificial grass.
- Crushed gravel for the base layer
- Sand (optional, for certain turf types as infill)
- Flat shovel or turf cutter for site preparation
- Tamper or plate compactor for compacting the base
- Artificial turf rolls
- Landscape nails or adhesive for securing the turf
Tips on Selecting Quality Turf
When selecting artificial turf, prioritize products that offer UV protection to prevent fading from sunlight exposure. Additionally, look for turf with good drainage capabilities to avoid water pooling. Reviews and recommendations can be valuable, so research and select a reputable brand to ensure longevity and satisfaction.
Preparing the Site
Clearing the Area of Debris and Existing Grass
The existing surface needs to be cleared before installing artificial turf. Remove any plants, rocks, or debris. If the area is covered with natural grass, it should be thoroughly removed using a shovel or a sod cutter for larger areas. Ensure all roots and remnants are extracted to prevent uneven surfaces.
Importance of Leveling and Compacting the Soil
After clearing the area, the next step is leveling and compacting the soil. This step is crucial for preventing future settling or drainage issues. Use a rake to level the soil as much as possible, then compact it using a tamper or a plate compactor. A well-compacted base ensures a solid foundation for the artificial turf, contributing to its appearance, performance, and longevity.
Laying the Foundation
Creating a Stable Base
Instructions for Laying a Gravel Base
A stable base is essential for artificial turf to prevent shifting and promote proper drainage. Here’s how to achieve it:
- Depth and Material: After soil compaction, add a layer of crushed gravel to create your base. This layer should be approximately 3-4 inches deep. Use 3/8″ crushed stone mixed with fines for the best compaction.
- Spreading the Gravel: Evenly spread the gravel across the prepared area. Use a rake or shovel for distribution. Pay special attention to ensure the surface is level. A slight slope (about 1% grade) away from buildings or the center of the lawn area is recommended for optimal drainage.
- Compacting and Leveling the Base: Compact the gravel with a plate compactor, available for rent at most hardware stores. This process solidifies the base, preventing settling and providing a firm foundation for the turf. Check the levelness of the base using a long level or a straight board with a level on top. Make sure the base is level everywhere by making the needed changes.
Weed Barrier Installation
Benefits of a Weed Barrier
A weed barrier is a crucial component in preventing weeds from growing up through your artificial turf. Besides inhibiting weed growth, it also helps to stabilize the base and can improve drainage.
Best Practices for Laying the Barrier
Here’s how to properly install a weed barrier for your artificial turf:
- Coverage: After compacting the gravel base, roll out the landscape fabric or weed barrier over the entire area. The barrier should cover the gravel base completely.
- Overlap: When laying down multiple pieces of fabric, ensure there’s at least a 6-inch overlap between pieces. This overlap prevents weeds from finding their way between the seams.
- Securing the Barrier: Use landscape staples or pins to secure the weed barrier to the ground. Place staples approximately every three feet along the edges and within the interior of the barrier to ensure it stays flat and doesn’t shift during turf installation.
- Cutting to Fit: Cut the fabric with a utility knife or scissors to make it fit your area just right. Be careful when cutting around the edges and corners to cover the whole space without leaving any open spots.
Installing the Artificial Turf
Rolling Out the Turf
How to Correctly Unroll and Position the Turf
After preparing the base and installing the weed barrier, it’s time to lay out the artificial turf. Start by rolling out the turf across the area you’ve prepared. Allow it to rest for at least a couple of hours or even a day, if possible, to eliminate any creases or wrinkles from being tightly rolled. Make sure the turf is laid out so that all the grass blades face the same way to look even and tidy. Adjust the turf edges to fit the area precisely, ensuring it covers the intended space without stretching or bunching up.
Techniques for Trimming Edges to Fit
Cut the turf edges with a sharp utility knife or carpet cutter to ensure it fits your space exactly. Cut from the backside of the turf, keeping the blade angled away from the turf backing to avoid cutting too deeply into the fibers. Regularly changing the blade ensures clean cuts. Pay special attention to contours and obstacles, like trees or walkways, by making precise cuts for a natural-looking fit.
Securing the Turf
Discussing Different Methods to Secure the Turf
Securing the turf properly is essential to prevent shifting and lifting. Use landscape nails or staples, spaced about 6 inches apart along the edges and 12 to 24 inches throughout the center. For areas with heavy foot traffic or for turf on slopes, consider using adhesive in conjunction with nails for extra security. Apply the adhesive to the seam tape or directly onto the base before laying the turf edges down, pressing firmly to ensure a strong bond.
Tips for Ensuring a Tight Seam Between Turf Strips
Achieving tight seams between strips of turf is crucial for a seamless look. Lay adjacent turf strips close to each other without overlapping. Use seam tape and adhesive for joining the pieces, applying the adhesive evenly along the tape. Press down the edges onto the tape, ensuring they are straight and tightly butted together. Weighing down the seams for a few hours can help to create a bond without any visible gaps.
Adding Infill (if applicable)
Types of Infill Material
Infill helps to keep the turf blades upright and adds extra weight to the turf, aiding in its stability. Silica sand, crumb rubber, or a mix of both are often used as infill for artificial turf. They help make the turf feel softer and improve water drainage.
Instructions for Evenly Spreading Infill
Even distribution of infill across the turf surface is vital for its effectiveness. Begin spreading the infill at one end of the lawn, using a drop spreader for even coverage. Use a hard broom or a power broom to lightly sweep the turf upwards. This helps the infill settle down at the turf’s bottom. This process may need to be repeated several times to ensure the infill is evenly distributed and the turf blades are standing upright.
Finishing Touches and Maintenance
Grooming Your Turf
Techniques for Brushing the Turf to Lift the Blades
After fake grass installation and infill application, brushing the turf helps to lift the blades, making the lawn look fuller and more natural. Use a hard brush or a special tool made for turf to do this job. Gently brush against the grain of the blades to fluff them up. For larger areas, consider using a power broom to save time and achieve uniform results. Brushing the turf often, especially where it gets used a lot, helps keep it looking new and lively.
Installing a Border (Optional) for a Neat Finish
Adding a border around your artificial turf can enhance its appearance and help to define the area. Options for border materials include metal edging, concrete curbs, or plastic. The border should be installed flush with the turf surface or slightly higher to prevent tripping hazards and create a clean line between the turf and adjacent landscaping features. This not only makes it look nicer, but it also helps keep the infill material in place.
Long-Term Care and Maintenance
Routine Cleaning Recommendations
Artificial turf requires minimal maintenance, but regular cleaning will help to maintain its appearance and longevity. Use a leaf blower or a plastic rake to get rid of leaves and stuff that shouldn’t be on the turf. If something spills or leaves a stain, just clean it with water and a gentle soap. Don’t use strong cleaners because they can mess up the turf. Make sure to wash it well with water after you clean it.
How to Address Minor Repairs
Over time, small fixes might be needed because of regular use or unexpected damage. For small tears or separations in the turf, use a turf adhesive to reattach or mend the areas. Make sure the areas you’re sticking together are clean and dry for the strongest glue hold. If a section of the turf is significantly damaged, it may be necessary to cut out the affected area and replace it with a new piece of turf. Match the grain and blade direction of the new piece with the existing turf for a seamless repair.
Conclusion
With the right finishing touches and ongoing care, your artificial turf can remain a beautiful and durable feature of your outdoor space for years to come. Grooming keeps the lawn looking natural and inviting, while a well-chosen border can enhance its overall appearance. Regular cleaning and prompt attention to repairs will protect your investment and ensure your artificial turf continues to offer a low-maintenance, green oasis in your garden or outdoor area. If you’re thinking about adding artificial turf to your place, remember to reach out to Ace Landscapes for help.

